OnTheSnow Ski & Snow: Set a Powder Alert in 5 Steps
I use one saved-resort routine to catch fresh snow before a drive, and you can set it up before the next weather shift.
Uma MarshReviewer · published Oct 24, 2026 · 6 min read
01Start with the resort you could actually reach
At 6 a.m., a vague snow forecast is not enough to decide whether I should load skis into the car. I first narrow OnTheSnow Ski & Snow to the one or two mountains I could realistically visit, then compare their reported snowfall, conditions, webcams and forecast from the same place. That keeps a tempting distant storm from distracting me.
Choose resorts by travel range, pass access and the kind of terrain you want, not by the biggest snow number alone. A local hill with steady new snow, open lifts and clear visibility can be a better day than a larger destination facing wind or limited operations. This is where the app’s My Resorts view becomes more useful than a broad regional browse.
02Add a mountain to My Resorts before setting alerts
Save the resort first. Powder alerts work best when My Resorts contains only places you would genuinely consider, rather than every mountain that looks good in a regional report. I keep a short working group: a close option, a reliable larger mountain and one destination worth watching when a bigger system arrives.
1. Tap “Search” on the main screen.
2. Enter the ski resort name in the search field.
3. Tap the matching resort in the results.
4. Tap “Add to My Resorts” on the resort page.
5. Tap “My Resorts” and check that the resort appears.
Once those names are gathered, you can compare the same practical set whenever snow starts falling. The next choice is the threshold, and that is where many alerts become either useful or noisy.
Open the saved resort and use “Powder Alert.” The custom amount should represent enough fresh snow to alter what you do: leave earlier, choose a different hill, bring wider skis or reserve a day for softer terrain. A very low setting can turn ordinary overnight snowfall into repeated weather alerts that stop feeling urgent.
1. Tap “My Resorts.”
2. Tap the resort you saved.
3. Tap “Powder Alert.”
4. Choose the new-snow amount that matters to you.
5. Tap “Save” or “Done.”
I prefer a threshold that reflects the mountain’s usual snow pattern. A modest amount can be meaningful at a place where fresh snow is uncommon, while a snowier area may need a higher bar. The point is not to catch every flake; it is to flag the mornings worth a closer look.
04Check the report behind the notification
A powder alert is a reason to open the resort page, not a reason to leave immediately. Start with the snowfall figure, then scan the reported surface conditions and lift or trail status. Fresh snow can fall above the base area, arrive with wind, or sit on terrain that is not yet open. The report gives the alert its context.
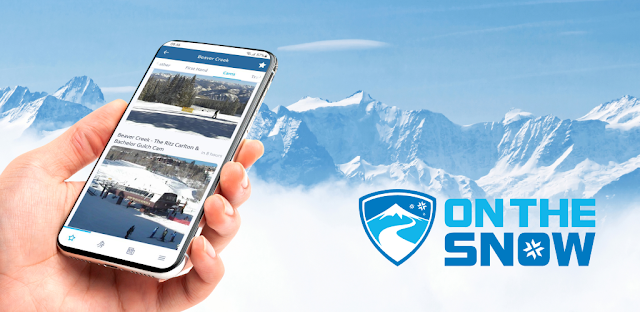
Next, tap “Webcams” and look at the most useful camera rather than the prettiest view. A base camera can reveal crowding, visibility and whether precipitation is reaching lower elevations. A mid-mountain or summit image can reveal cloud level and wind effects. If the images look old or unclear, treat them as one clue, not the final answer.
I also read the resort forecast before choosing departure time. The useful question is not simply whether more snow is coming; it is whether the weather is likely to improve, worsen or make the drive less appealing. For a real estate agent who spends plenty of time between appointments, that distinction prevents unnecessary detours.
05Compare saved resorts instead of chasing one headline
Use “My Resorts” as your decision board. Put the strongest snowfall number beside the forecast, webcams and conditions for each saved mountain. A resort with less new snow may still win because it has better visibility, more dependable operations or weather arriving at the right time. Comparing within one screen prevents a single social post from steering the whole day.
If you have an applicable mountain pass, browse the app’s pass view as a second filter after checking conditions. It can help you keep attention on places you can use, rather than building a plan around a resort that is impractical. I treat pass availability as a planning constraint, just like distance and expected road conditions.
This same habit keeps ski planning separate from the chores competing for a weekend. I might have car maintenance on my list before a mountain drive, and a quick home security check before an overnight trip, but neither belongs inside the snow decision. First decide whether conditions justify going; then handle the trip tasks.
06Tune alerts after the next snowy forecast
Revisit “Powder Alert” when its messages are not matching the days you would choose. Raise the amount if alerts arrive for snow that rarely changes conditions. Lower it if your nearby mountain is modest and you want notice of any meaningful refresh. A useful alert should make you curious, not make you dismiss it automatically.
Do not rely on one resort all season. Add an alternate mountain with different elevation or location, then compare both when a storm splits across a region. This is especially helpful when weather alerts point to changing snow levels: one area may receive wet snow or rain while another stays colder higher up.
Finally, use the Snow feed and firsthand reports as texture after you have checked the basic report. Photos can reveal coverage near the base, wind-blown ridges, busy lift lines or soft tree skiing. They are most valuable when they confirm the practical picture you already built.
The takeaway
First, save only the resorts you can realistically ski, then set each Powder Alert at an amount that would genuinely change your plans. When it fires, check snowfall, conditions, webcams and forecast together before you leave.
Continue to this site’s OnTheSnow Ski & Snow page just below for more practical app guidance.
Notes After Use is independent and not affiliated with Mountain News Corporation. This guide reflects the reviewer's own setup; menus can differ by device and version.
 TipsTownSq Community

 CompareWedding Planner by MyWed

 TipsBend

 Best picksUrban Company

 TroubleshootingFood City

 TroubleshootingtheScore
 How-toStronger

 CompareGmail

 How-toStop & Shop
 How-toNETGEAR Nighthawk WiFi

 How-toGoWish