I’ll show you how to make a separate guest WiFi network before visitors start asking for your main password.
Uma MarshReviewer · published Nov 8, 2026 · 6 min read
01Set the boundary before someone asks for your main password
A visitor is standing in the hallway, phone in hand, and the usual answer is to recite the same WiFi password used by every device at home. I prefer a guest network because it gives visitors their own connection while keeping the main network name and password private. It is a small change that makes a busy house easier to manage.
A guest network is especially useful when friends bring a laptop, a delivery worker needs brief access, or family members arrive with several devices. It can also keep a smart TV, wireless printer, and other home equipment separate from visitor traffic. Guests still use the internet, but they do not need the credentials that run your everyday setup.
Have the name and password you want to use in mind before opening the app. A clear name such as Home-Guest is easier to spot than a string of numbers, and a fresh password means you are not reusing the one that protects your main Wi-Fi router. The next screen is where the separation begins.
02Open Guest WiFi from the Nighthawk home screen
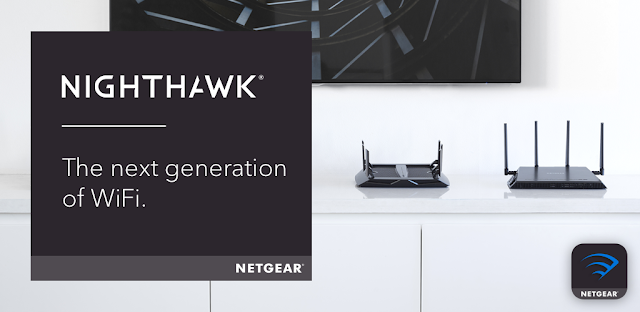
Start while your phone is connected to the home network if possible. The NETGEAR Nighthawk WiFi app can provide remote controls through Anywhere Access, but initial router changes are simplest when you are near the router and can immediately reconnect if needed. Sign in with the router administration details used for the app.
Tap these controls to reach the guest-network page:
Open the NETGEAR Nighthawk WiFi app.
Tap WiFi Settings on the Home screen.
Tap Guest WiFi.
Tap the Enable Guest WiFi switch.
Once the switch is on, look for the fields for the guest network name and password. Some routers present separate options for 2.4 GHz and 5 GHz WiFi; others combine the choices. Use the labels already shown on your screen rather than trying to make both bands match by guesswork. The important choice comes before you save it.
Use a name that identifies the network as guest access without revealing your address, family name, or router model. Home-Guest or Guest-WiFi works well. Give it a password that visitors can type comfortably, but do not make it the same as your main WiFi password. This is the point of having two separate connections.
Set the name, password, and isolation option with these controls:
Tap Network Name (SSID) and enter the guest name.
Tap Password and enter a new guest password.
Leave Allow guests to see each other and access my local network turned off.
Tap Save.
That local-network setting matters more than the network name. Leaving it off helps prevent a guest device from reaching things such as a wireless printer or a shared storage device. It also avoids awkward surprises when someone connects a laptop and suddenly sees equipment that was meant only for household use. Now confirm that the new network really accepts a connection.
04Connect one device before sharing the password widely
After saving, open WiFi on one spare phone or ask a household member to join the new guest network. Enter the password exactly as you set it. Successful internet access is the basic check, but take an extra moment to confirm that the device joined the guest name rather than automatically returning to the main network.
If the network name does not appear right away, move closer to the router and refresh the available WiFi networks on the device. A phone can cling to its previous connection, particularly when the main and guest names look alike. Switching WiFi off and back on in the phone settings can force a new scan without changing anything on the router.
I would also try the guest connection in the room where visitors actually sit. In my work between property appointments, a reliable guest connection is more useful than a clever network name when someone needs to send a document from the kitchen. Once it is working, share only the guest password, not the router login.
05Use the guest network for visitors, not every household device
Guest WiFi is best for temporary or less-trusted devices: a friend’s laptop, a relative’s tablet, or wireless earbuds that need a quick connection for an app. Keep devices that need to communicate with each other on the main network, since the guest isolation setting can stop them from finding local equipment.
A smart TV can be the deciding example. If guests only need internet access on their own phones, the guest network is a clean fit. If you want a visitor’s phone to show photos on your TV, both devices may need to be on the same network for that particular connection method. Put convenience and privacy in the right order for the situation.
When the visit is over, you can leave the guest network active for the next time or change its password if it has been shared broadly. Pausing WiFi is useful for a temporary interruption, but it is not a substitute for a separate guest connection. The next maintenance check keeps these controls available.
06Check router firmware when a setting looks different
The app’s router controls can change as firmware changes, so check the router settings periodically rather than assuming the screen will always look identical. NETGEAR’s app includes firmware management, and keeping that software current can bring router improvements and keep the feature set aligned with the app.
From the app’s Home screen, open Router Settings and look for Check for Updates. Follow the on-screen router firmware process if one is offered, and avoid interrupting the router while it is applying changes. Plan this for a quiet moment, not while guests are relying on the connection for a call or a stream.
Afterward, return to WiFi Settings and open Guest WiFi again. Confirm that the Enable Guest WiFi switch is still on and that the guest name remains visible from a phone. That one-minute check is more useful than discovering a problem when somebody is waiting at the door.
The takeaway
First, open WiFi Settings, turn on Guest WiFi, use a new password, and leave local-network access off before sharing anything with visitors.
Continue to this site’s NETGEAR Nighthawk WiFi page just below for more practical app guidance.
Notes After Use is independent and not affiliated with NETGEAR, Inc. This guide reflects the reviewer's own setup; menus can differ by device and version.
 TipsTownSq Community

 CompareWedding Planner by MyWed

 TipsBend

 TroubleshootingFood City
 TroubleshootingtheScore
 How-toStronger
 CompareGmail
 How-toStop & Shop
 How-toGoWish

 How-toMango Languages Learning